Have a 3D printer but find design software frustrating? OpenSCAD flips the script: instead of dragging shapes around, you write simple code that describes exactly what you want. It sounds odd, but it's faster, more precise, and far more flexible than mouse-driven CAD.
By the end of this guide, you'll have designed and exported your first custom 3D object.
Why OpenSCAD?
- You describe, not draw. Write
cube([20, 30, 10]);and you get a perfect 20×30×10mm box. - Parametric by default. Every dimension can be a variable. Change one number and your whole model adapts.
- Perfect for printing. Generates clean meshes that slice without errors.
- Free and open source. Works on Windows, Mac, and Linux. No subscriptions.
- Designs are just text files. Version control them, share them, collaborate.
Your Secret Weapon: AI
AI assistants are exceptionally good at OpenSCAD because it's a scripting language with predictable patterns. ChatGPT, Claude, and Copilot can generate, modify, and debug scripts on demand.
Just ask things like:
- "Create an OpenSCAD script for a wall-mounted hook, 40mm long, 12mm diameter, curved 80°, with a 60×60mm mounting plate and two screw holes spaced 40mm apart."
- "Add mounting holes to this design." (paste your code)
- "Debug this script — it's not rendering correctly."
- "Make this box have rounded 3mm corners."
You don't need to memorize every function. Learn enough to read and tweak AI-generated code, then let AI handle the heavy lifting.
Install OpenSCAD
Download it at openscad.org/downloads.html for Windows, Mac, or Linux. Package manager shortcuts:
| Platform | Command |
|---|---|
| Windows (Chocolatey) | choco install openscad |
| macOS (Homebrew) | brew install --cask openscad |
| Ubuntu/Debian | sudo apt-get install openscad |
Verify it works: Open OpenSCAD, type cube(20);, press F5. A 20mm cube appears. You just made a 3D model.
The Basic Workflow
- Write code in the editor
- F5 — fast preview
- Tweak and repeat
- F6 — final render (slower, precise)
- File > Export > Export as STL
- Open in your slicer (Cura, PrusaSlicer) and print
Build Something: A Storage Box
Step 1 — Solid block
width = 50;
length = 70;
height = 30;

cube([width, length, height]);
Step 2 — Make it hollow
width = 50;  length = 70;  height = 30;
wall = 2;

difference() {
    cube([width, length, height]);
    translate([wall, wall, wall])
        cube([width - wall*2, length - wall*2, height]);
}
difference() subtracts everything after the first object from the first object. The translate moves the inner box 2mm in on all sides.
Step 3 — Round the corners
width = 50;  length = 70;  height = 30;
wall = 2;  radius = 3;  $fn = 50;

difference() {
    translate([radius, radius, 0])
    minkowski() {
        cube([width - radius*2, length - radius*2, height - 1]);
        cylinder(r=radius, h=1);
    }
    translate([wall, wall, wall])
        cube([width - wall*2, length - wall*2, height]);
}
minkowski() "inflates" the cube by the corner radius — like rounding padding on a CSS box.
Step 4 — Export
Press F6, wait for it to finish, then File > Export > Export as STL. Print open-side up at 0.2mm layers, 15–20% infill.
Essential Commands
// Shapes
cube([20, 30, 10]); // width, depth, height
cylinder(h=20, r=5); // or use d=10 for diameter
sphere(r=10);
// Move & rotate
translate([10, 0, 0]) cube(5);
rotate([0, 0, 45]) cube(10);
// Combine, subtract, intersect
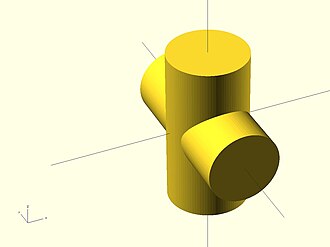
union() { cube(10); translate([8,0,0]) cube(10); }
difference() { cube(20); translate([10,10,0]) cylinder(h=25, r=3); }
intersection() { cube(20); sphere(r=12); }Always extend holes beyond the surface — it prevents rendering artifacts:
// Good: hole starts -1 below and extends +1 above
translate([10, 10, -1])
    cylinder(h=7, r=2);  // Box is only 5mm tall
Control smoothness with $fn — use low values while designing (fast), high for final render:
$fn = 30;   // Preview
$fn = 100;  // Final render
3D Printing Rules to Live By
| Rule | Why |
|---|---|
| Walls ≥ 2mm | Thinner walls crack |
| Add 0.2–0.4mm tolerance to holes | Printed parts shrink slightly |
| Overhangs ≤ 45° | Steeper angles need supports |
| Bridges ≤ 20–30mm | Longer spans sag |
| Use variables, never raw numbers | Makes designs instantly adjustable |
Common Problems
"Object is not a valid 2-manifold" — objects don't quite overlap, or walls have zero thickness. Extend all subtractions beyond boundaries.
Model looks blocky — add $fn = 100; at the top of your file.
Parts don't fit — add tolerance: hole_size = peg_size + 0.3;
Stuck? Paste your code into an AI and ask. It's surprisingly good at this.
Go Further
- Official docs & cheat sheet: openscad.org/documentation.html
- BOSL2 library — professional-grade functions: github.com/BelfrySCAD/BOSL2
- Community: r/openscad
The best first project is something you actually need. Pick a small organizer, a cable clip, a phone stand — something useful. You'll have it designed in an hour and printing by tonight.